Creating customers, quotes and sales
Order Management Guide.. This article covers: Creating a Customer Creating a Quote Converting a Quote to a Sale Creating a Customer. Order Management From the left menu Navigation Bar, select Order M…
Order Management Guide
This article covers:
Creating a Customer
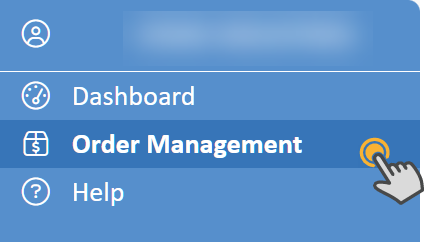
Order Management
- From the left menu Navigation Bar, select Order Management.
- Within order management, the Customers tab is selected.
- Select the Customer dropdown button on the right side of the page and select an option Dealer. This is the most common customer type.
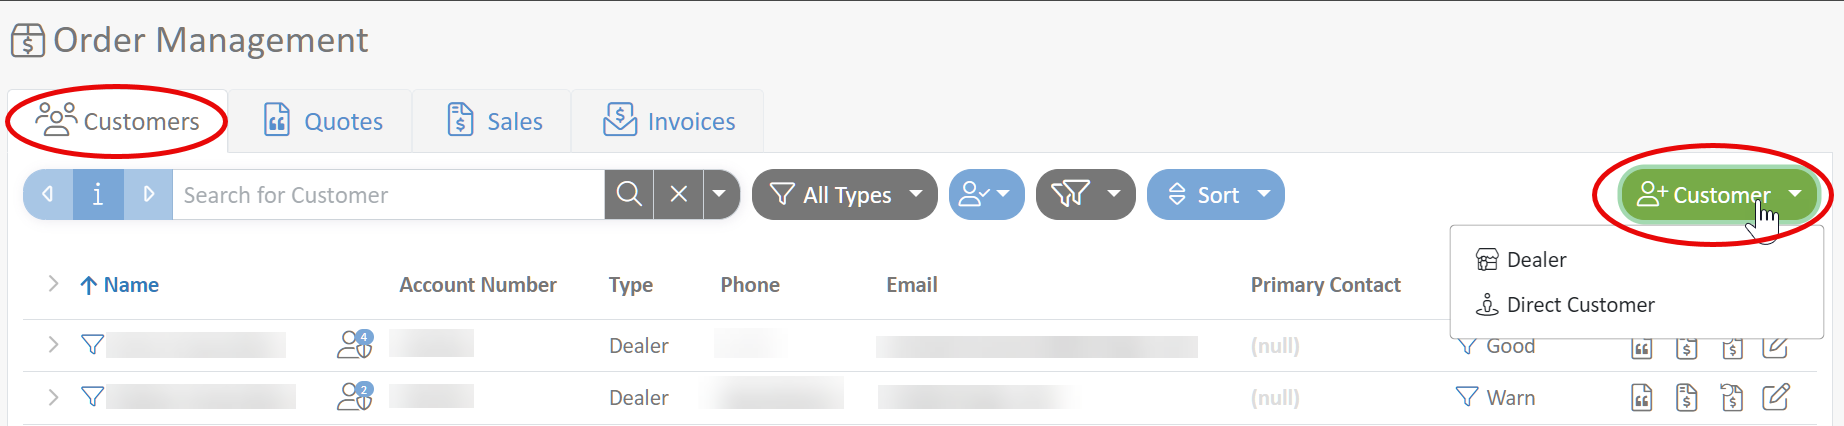
- Fill in the required fields at minimum, then click Done to create the customer.
Creating a Quote
Once a customer is created, a quote can be made.
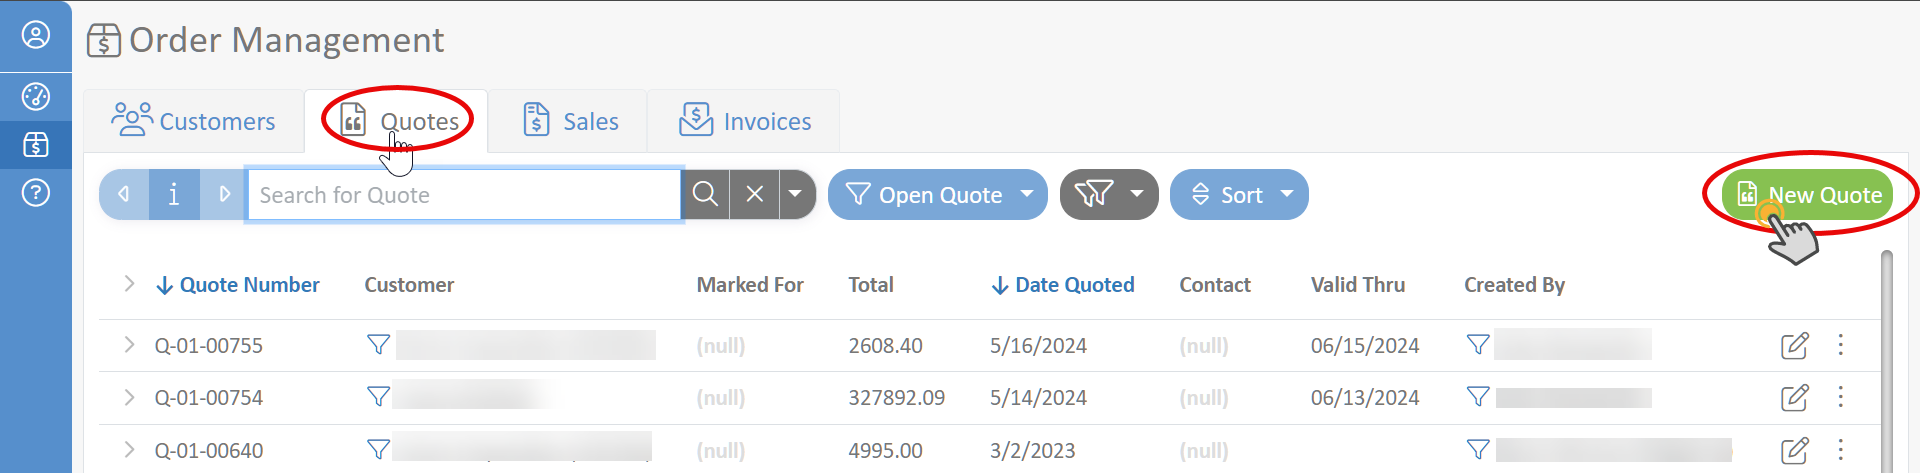
- From the Menu Navigation Bar, select Order Management.
- Select the Quotes tab, and click New Quote.
- Link a customer to the quote.

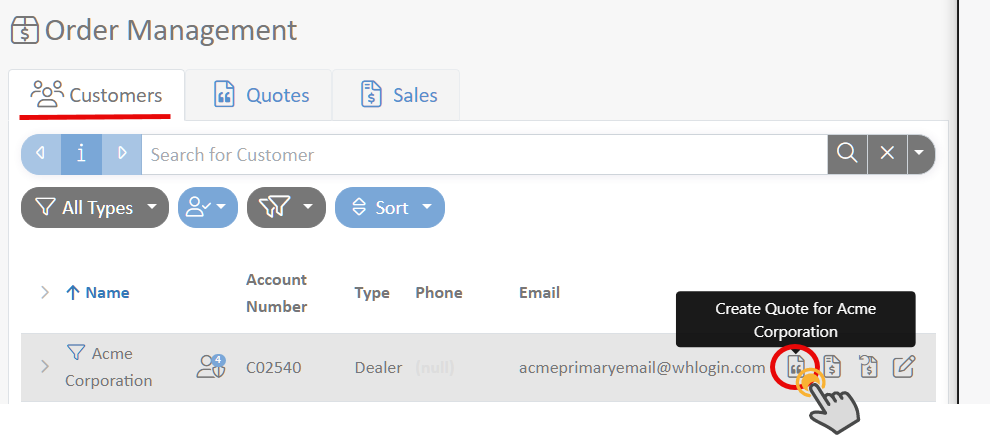
Quotes can also be made under the Customers tab!
Second
- Navigate to Order Management -> Customers tab -> on a customer select the Create Quote button.
Adding Items to Quotes:
- Once a Quote has been created, the items tab will open by default, click Add item
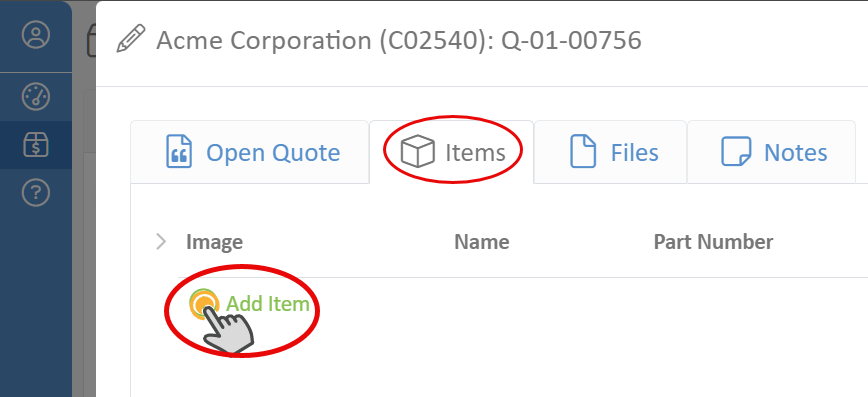
- "Browse" or "Search" for an item and select it.
- Some items are configurable and require selections to be made before adding the item to the quote.
If the item is not configurable, it will automatically be added to the order.
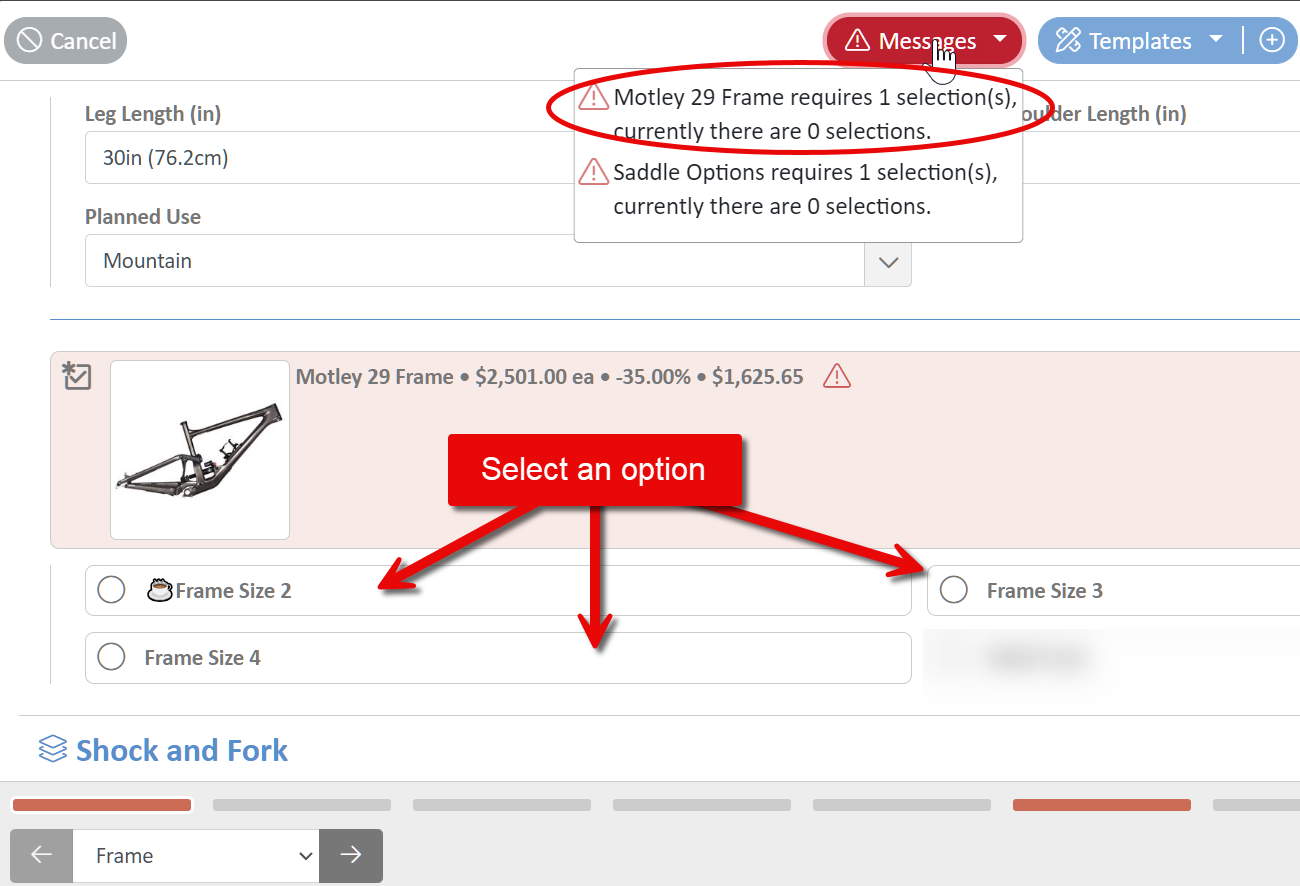
- Once the requirements are satisfied, click "Save & Close".
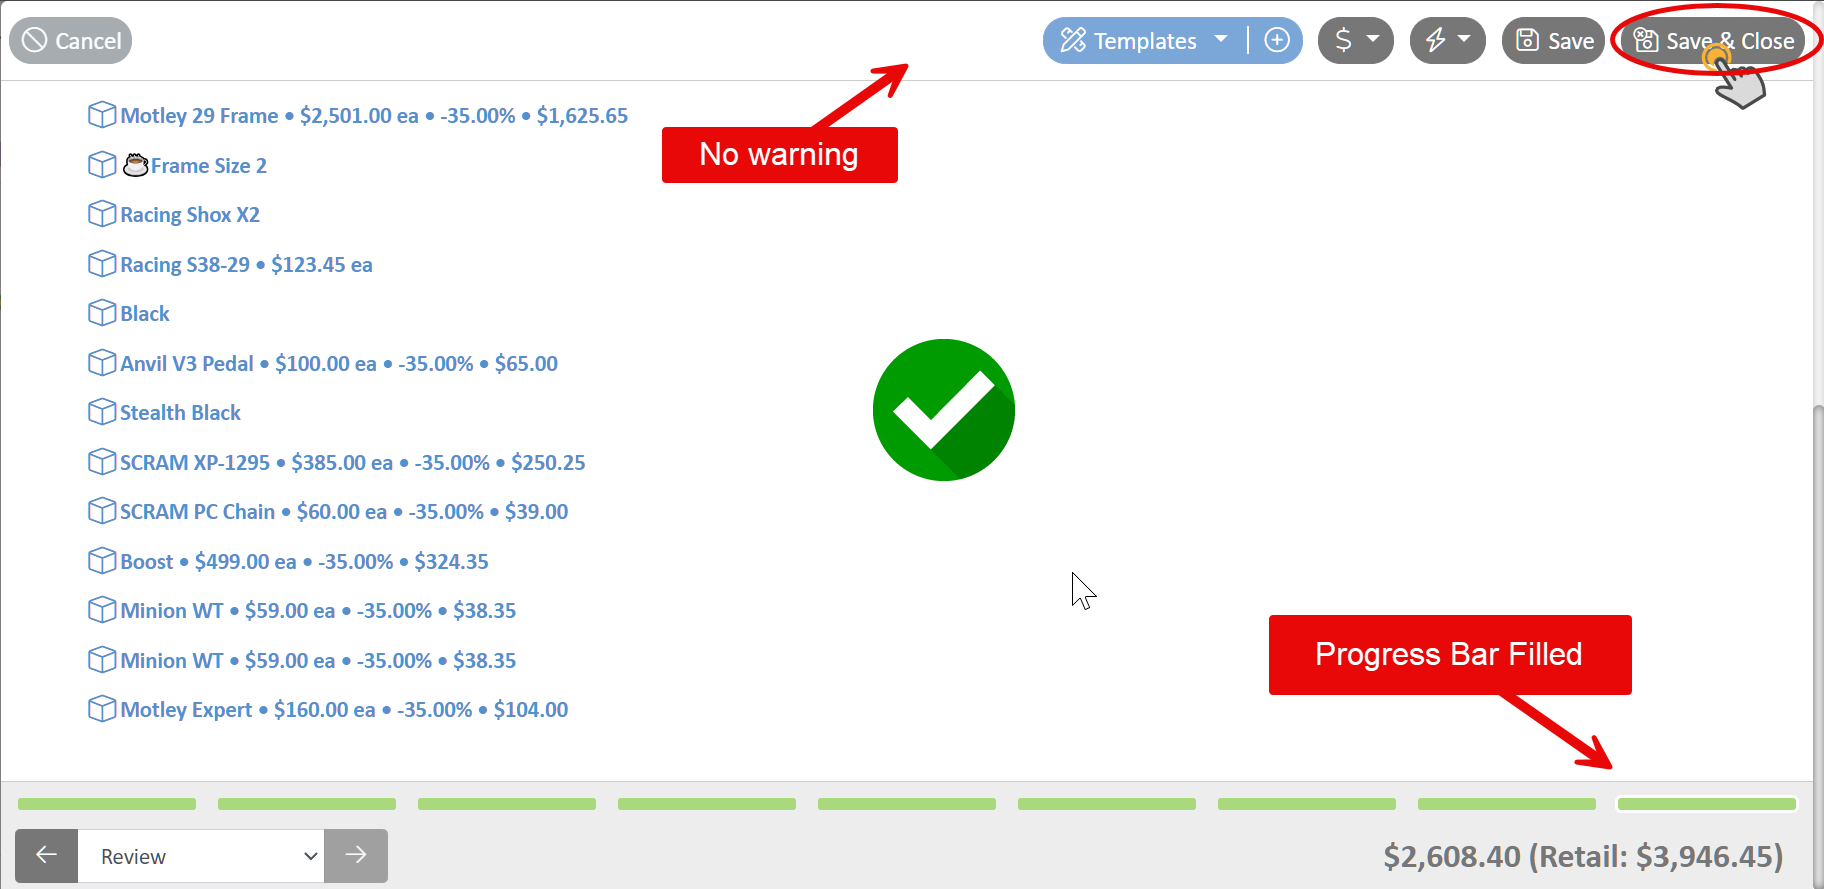
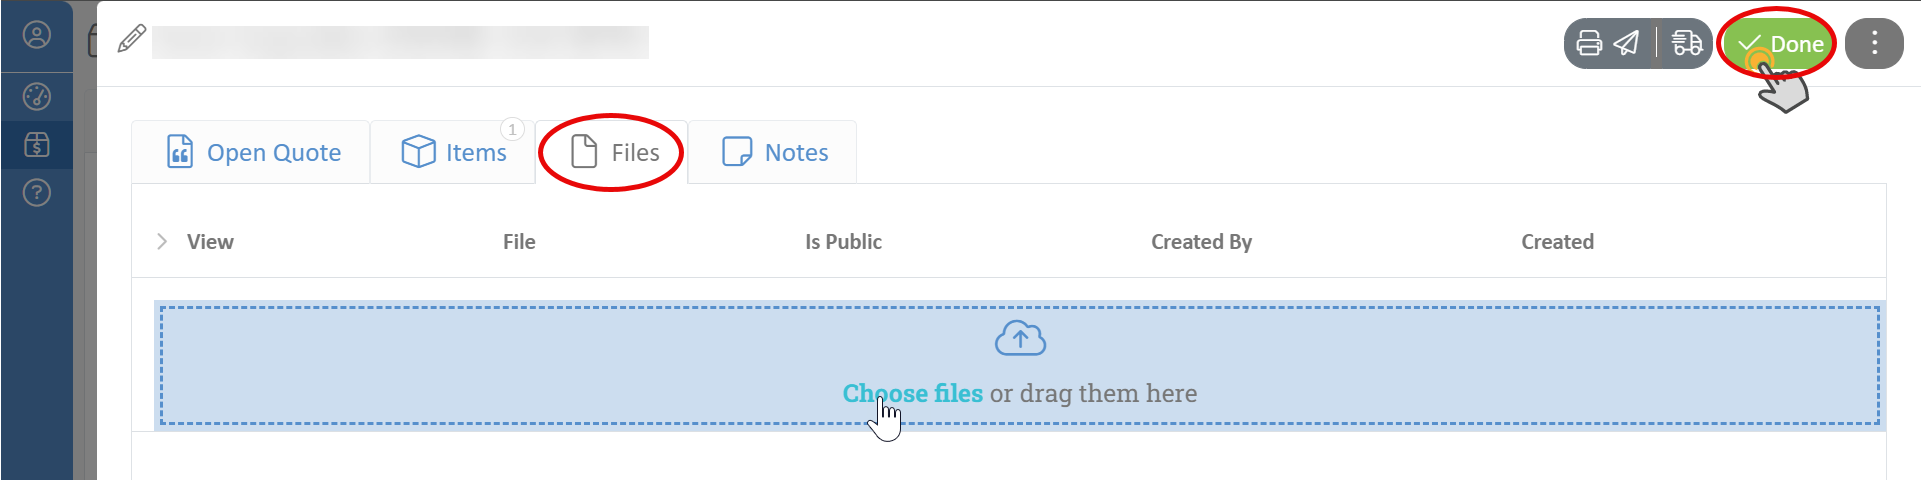
- Review each tab within the quote and click "Done" when finished.
Files or notes can be added before adding the item
Converting a Quote to a Sale
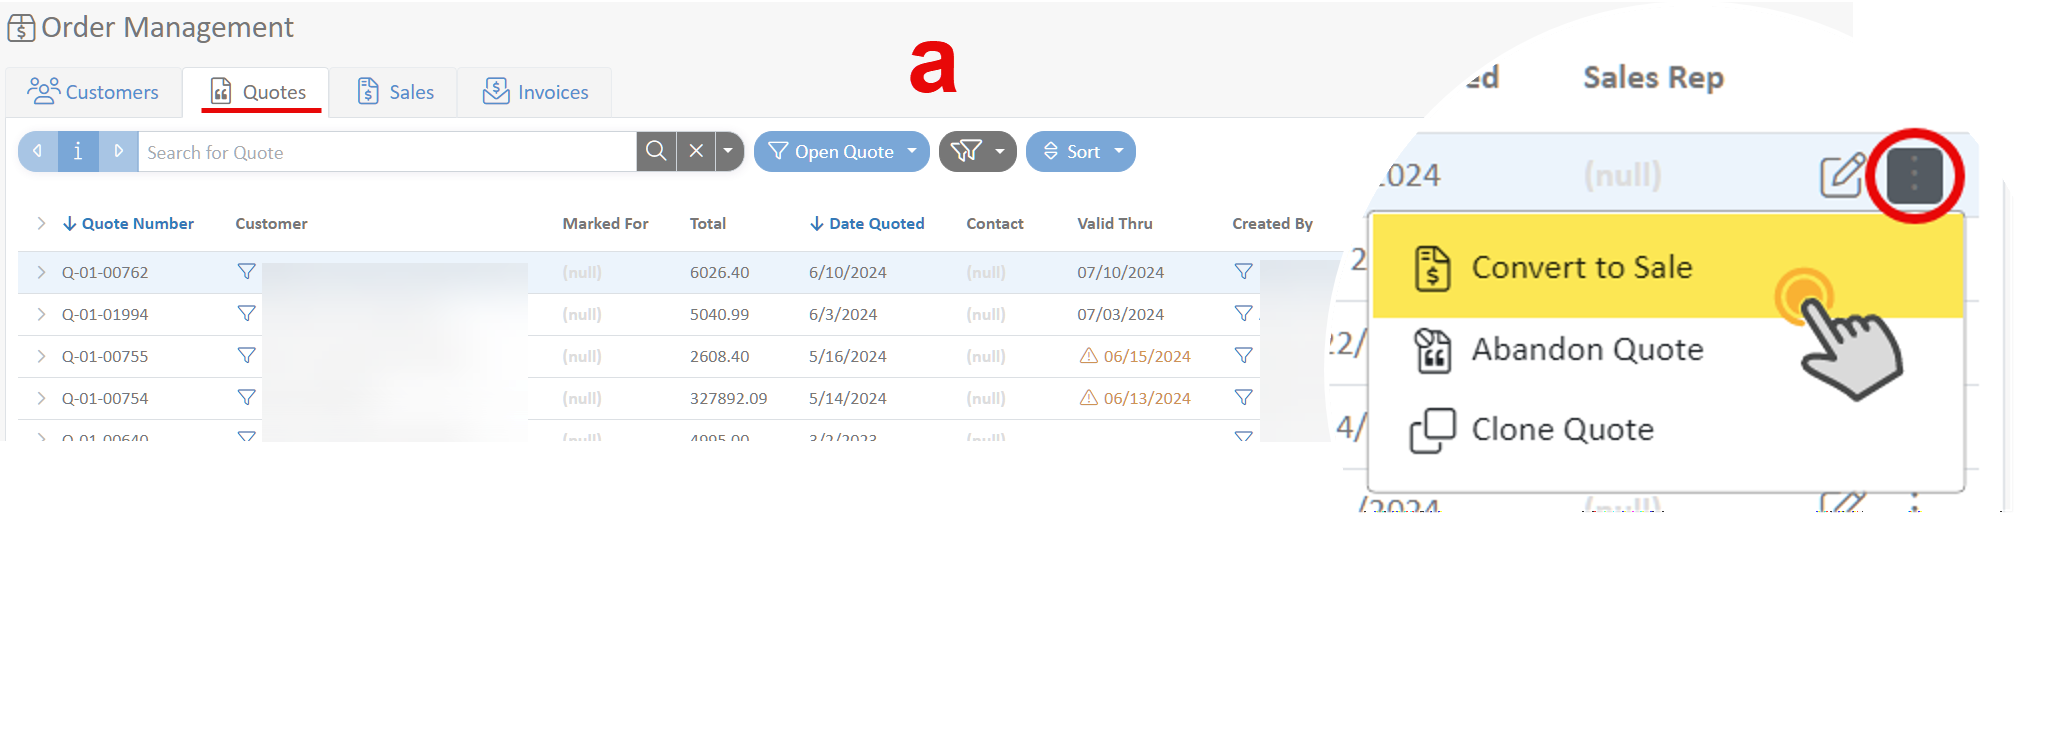
- Navigate to the Order Management menu -> Quotes tab and find a quote to convert.
- There are two ways to convert a quote to a sale:
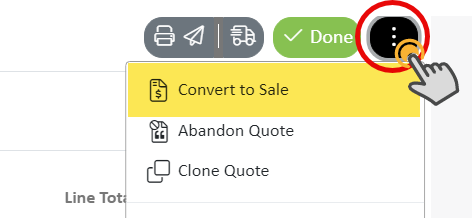
- First option: Select the three-dot dropdown menu to convert to a sale.
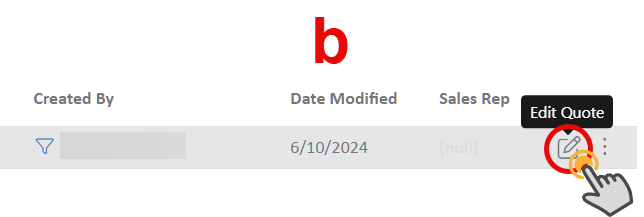
- Second option: Open the sale by double-clicking or selecting the Edit button, then select the three-dot dropdown menu to convert to a sale.
- Select the items that were sold from the quote
- Close or keep the quote open.
- "Convert" when finished.
Multiple sales can be created from a single quote, although it's not typical

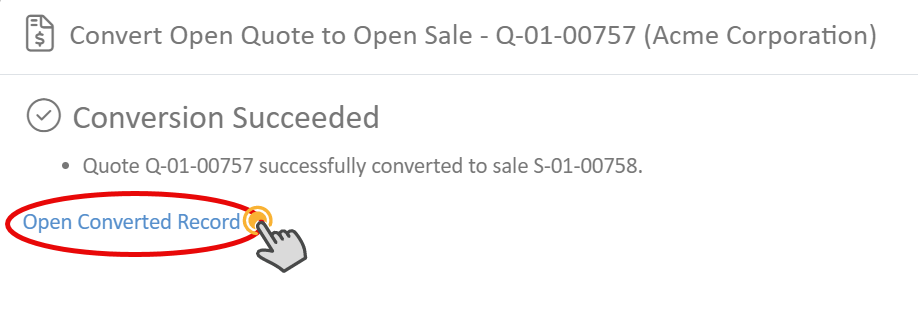
- A slide window receives confirmation that the quote was converted to a sale. Open the new converted Record.
- Under the "Items" tab, add a "Planned Ship Date" and any other fields in the Sale if applicable.
Even after the quote has been converted to a sale, items, shipment tracking details, files, and notes can still be edited or added.
Only internal users will see Planned Ship Dates
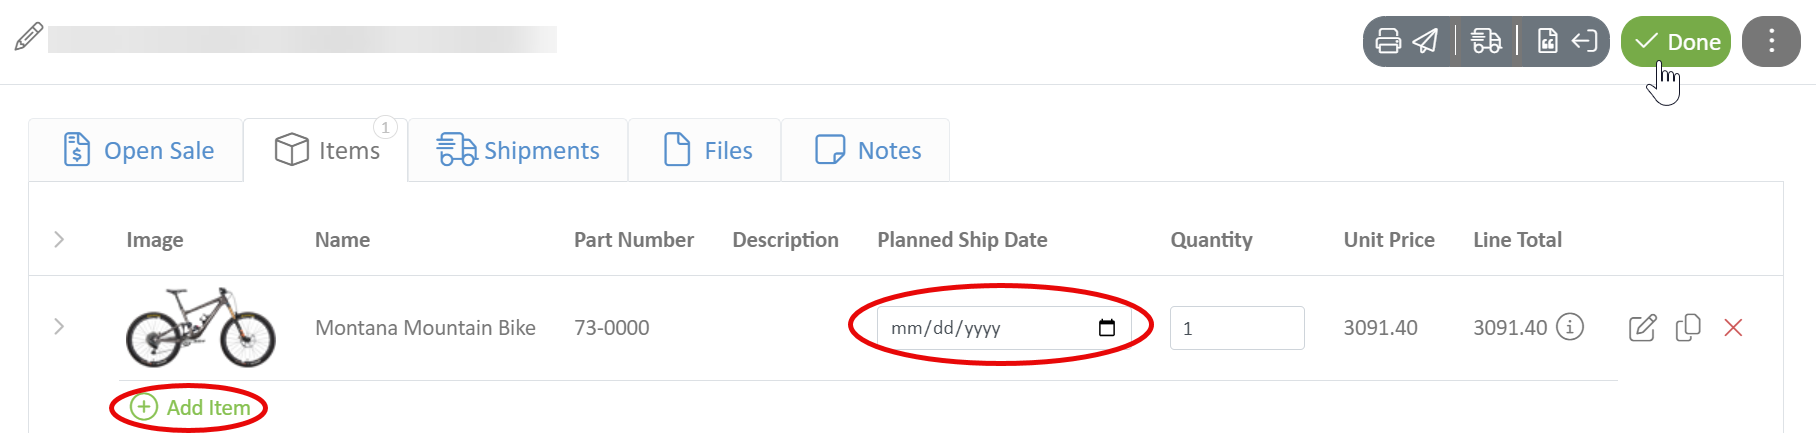
- Review all tabs and select "Done" when finished.
Related Articles
How did we do?
Closing a Sale