User Management: Adding, Editing, and Revoking Access
This guide demonstrates how to add users, assign login credentials, and manage user access in your organization.
Adding a User
To add users, Management or Administrator privileges are required.
To Add a User with a Dedicated, Shared, or Employee Badge Login:
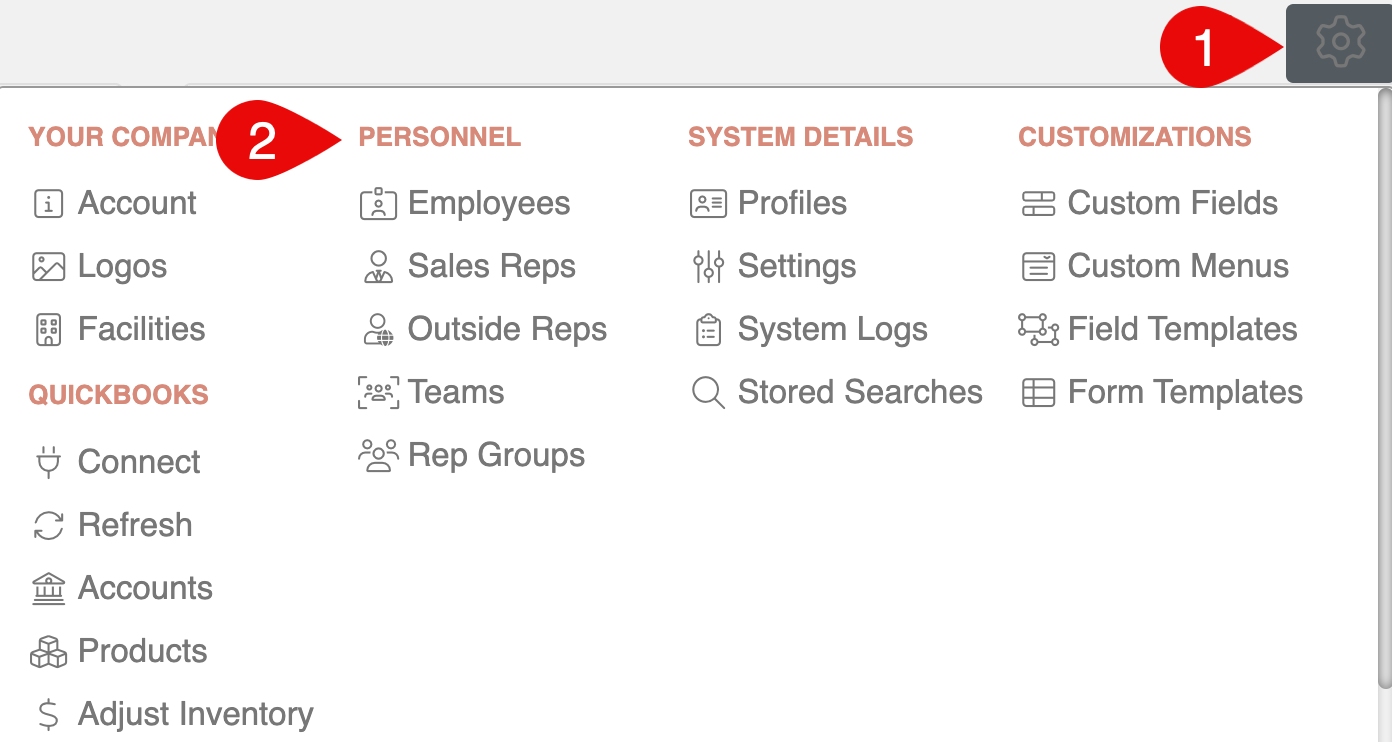
- In the gear menu at the top of the page, navigate to the Personnel. From this menu, any user can be added to your organization, whether they are general employees, sales representatives, or outside representatives:

- For general employees, navigate to Personnel → Employee
- For sales representatives, navigate to Personnel → Sales Rep (also accessible from the Sales menu with the Sales Manager role)
- For Outside representatives, navigate to Personnel -> Outside Rep (also accessible from the Sales menu with the Sales Manager role)
- Click the (+) or (+ New) button to add a new user.
- Add the First Name, Last Name, and Email. Click the Save icon to create the new user.

Since emails are used for login, they are a required field. For production employees who do not need system logins, an invalid email address can be entered such as "test@yourcompany.com".
- If the user needs a dedicated login, add a Public Name and Profile ID from the drop-down.

- It's best practice to leave the password blank so the new employee can set their own password. Leave it blank for now.
- If the employee does not need to log in and only needs to clock time in production, set a pin # and/or create a scannable badge. The QR code for the employee may be generated by using the link in the action menu.

- When the QR code appears, right-click the image and print.
- Click the Save icon again to save the user changes and reload the page.
After reloading the page, the Password Reset icon will appear on the toolbar. This action allows admins to send a password reset email to the employee, used both for setting a password for the first time or re-setting a password for an existing employee.
- Click the Password Reset to send the employee an email, allowing them to set their password for the first time. This button can also be used to reset existing employee passwords.

Revoking a User's Access to Wheelhouse
To "remove" a user from Wheelhouse, the process involves revoking a user's access rather than a complete deletion of their account. Revocation can be set immediately or it can be scheduled for a date in the future.
- In the left menu navigate to Personnel -> Employee, Sales Rep, or Outside Rep depending on the user's affiliation.
- Edit the user
- Under Details, set a date for Disable On Date depending on when you'd like to revoke their access:
- Revoke Access Immediately: Set the date to any time in the past
- Schedule Access Revocation: Set the date to any time in the future

- Save and Exit
Need help? Reach out to support@wheelhousemfg.com.
