Creating and Importing a Labor Routing
This article explains the basics of Labor Routings and how to import them into Wheelhouse from a spreadsheet. Prerequisites. In order to create or import a routing, your profile must include the Prod…
This article explains the basics of Labor Routings and how to import them into Wheelhouse from a spreadsheet.
Prerequisites
In order to create or import a routing, your profile must include the Production Admin role.
Labor Routing Terminology and Example
- To better understand the terminology used in this article, see Production Definitions
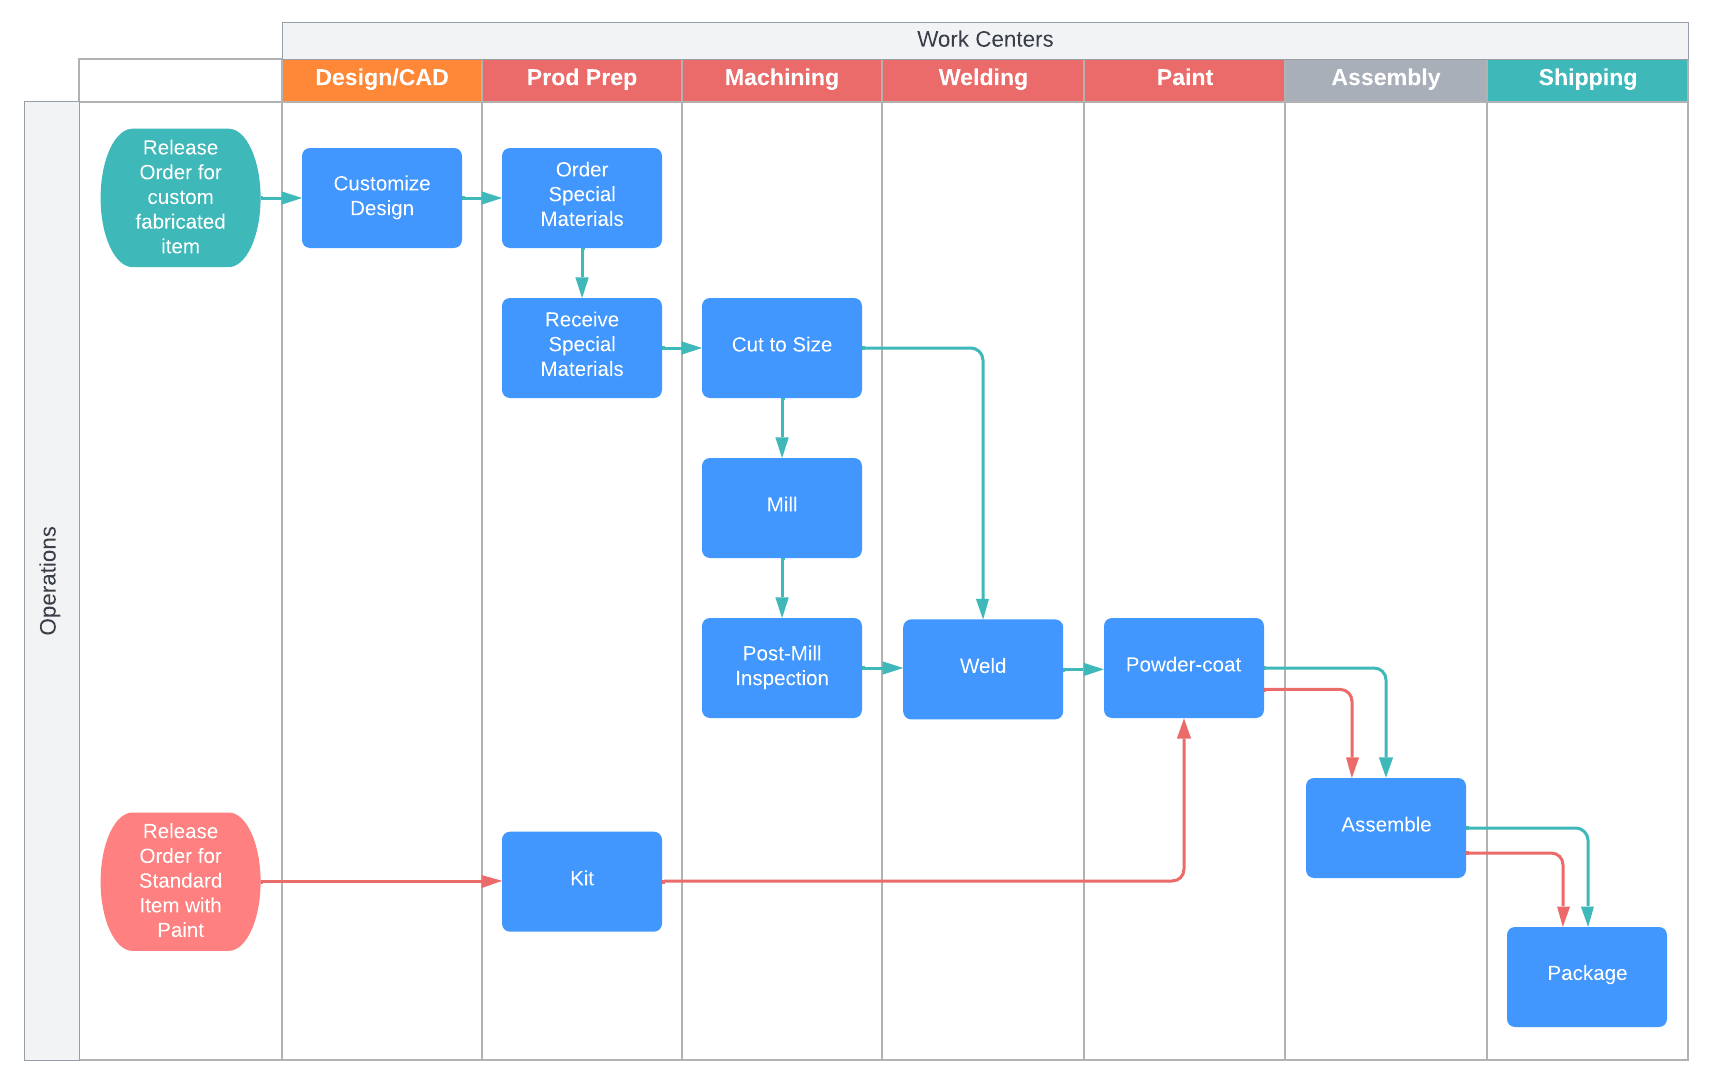
- Labor Routings (or simply 'Routings') define and control the flow of products through your production facility. A routing includes steps (called operations), predecessors, standard times, and other important information about your process. The example below shows two different routings that share the last three operations at the paint, assembly, and shipping work centers. The green path represents one routing, while the red path represents another routing.
Creating a Basic Routing
Administrator privileges are required.
- Define one or more Work Centers in Production -> Setup -> Work Center
- Open Production -> Setup -> Labor Routing
- Select the (+ New) or (+) button to create a new Labor Routing
- Provide a Name (all other information is optional)
- Click Save
- Once saved, additional tabs will appear. Select the Routing Designer tab.
- Click the (+) button to add a new operation.
- Give the operation a name, and select the Work Center where the operation will be performed.
- Add additional operations
- To edit the dependencies between the operations:
- Click on a connector to delete it
- Drag a link from the predecessor box to the termination box
- Use the scroll wheel on your mouse to Zoom
- Press and hold your scroll, then drag to pan
- Click Save to update the Labor Routing with the changes you've made. Review your routing to verify everything is correct.
Preparing your routing for import
- Download this Example Routing for Import.xlsx
- Update the spreadsheet with your own data. Start with a small set of operations for testing.
- Multiple routings may be added to the same spreadsheet - just give them different names in the Labor Routing column
Required Fields (Green highlighted in the example spreadsheet): Ref (row number), Labor Routing (name), Operation, Per Unit Time, Lot Time, Time Unit
Optional Fields (Yellow highlighted in the example spreadsheet): Labor Routing Item, Work Center, WC Workflow Sequence, WC Area, WC Facility, Depends On Ops, Depends on Previous, Applies To, Instructions, Create Op Template
Importing your routing
- Navigate to the Labor Routing list
- From the lightening-action menu, select Add/Update Routing, select options, and import.
If the routing operation isn't found, it will be added. This won't delete previously added operations.
Upload the complete routing with a 'Ref' column and 'Depends On Ops' column if you want to import dependencies. The Depends on Previous option is nice for simple routings.

How did we do?
Automatically Creating Work Orders