Bin Locations
Setup of Areas, Bays, and Bin Locations. Purpose & Benefits. Implementing a structured bin location system provides three key advantages: Efficient Communication - Staff can precisely communicate ite…
Setup of Areas, Bays, and Bin Locations
Purpose & Benefits
Implementing a structured bin location system provides three key advantages:
- Efficient Communication - Staff can precisely communicate item locations using a standardized format
- Streamlined Receiving Process - New inventory can be directed to designated locations immediately
- Simplified Inventory Management - Management can quickly locate all instances of any item
Bin Location Structure
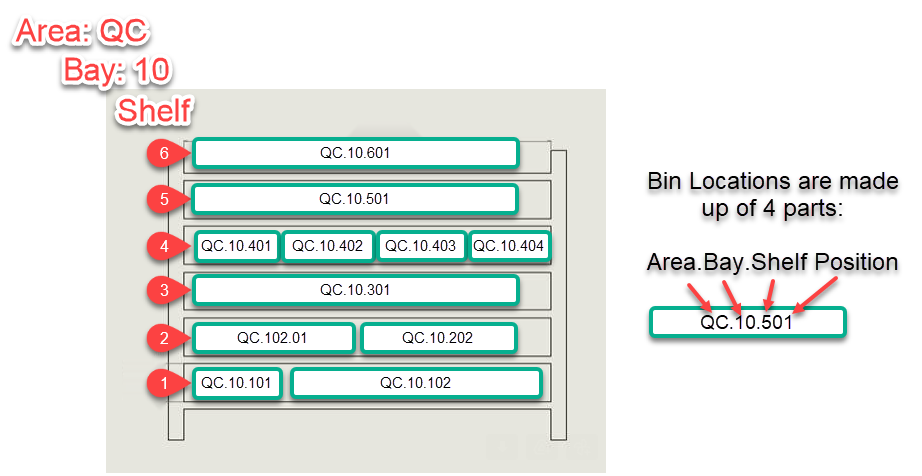
Each bin location uses a four-part hierarchical format that moves from general to specific:
- Area (Department/Zone)
- 1-3 letter code representing functional zones (ASM, WH, QC)
- Example: QC (Quality Control), WH (Warehouse), ASM (Assembly)
- Shorter codes improve readability and verbal communication
- Bay (Rack/Section)
- Numbered in increments of 10 (10, 20, 30...)
- This numbering strategy allows for future expansion without renumbering
- If you need to add a bay between Bay 10 and Bay 20, you can use Bay 15
- Shelf (Vertical Position)
- Numbered sequentially from bottom to top (1, 2, 3...)
- Starting from floor level allows for easier expansion upward
- This approach is more intuitive for most warehouse operations
- Position (Horizontal Location)
- Two-digit numbering (01, 02, 03...)
- Consistent two-digit format (even for single-digit positions)
- Accommodates up to 99 positions per shelf
- Makes it immediately clear which part of the code represents position
Example Location: QC.10.501
- This location code represents:
- QC - Quality Control Area
- 10 - Bay 10
- 5 - Shelf 5 (fifth shelf from bottom)
- 01 - Position 1 on that shelf
Shelves are numbered from the bottom to the top because it is usually much easier to add shelves to the top than to the bottom!
Bin Location Rules:
• Up to 99 positions per shelf
• Physical widths of bins are irrelevant. The position (count) is the only factor.
• Multiple items may be assigned to one bin location (not recommended)
• Up to 99 positions per shelf
• Physical widths of bins are irrelevant. The position (count) is the only factor.
• Multiple items may be assigned to one bin location (not recommended)
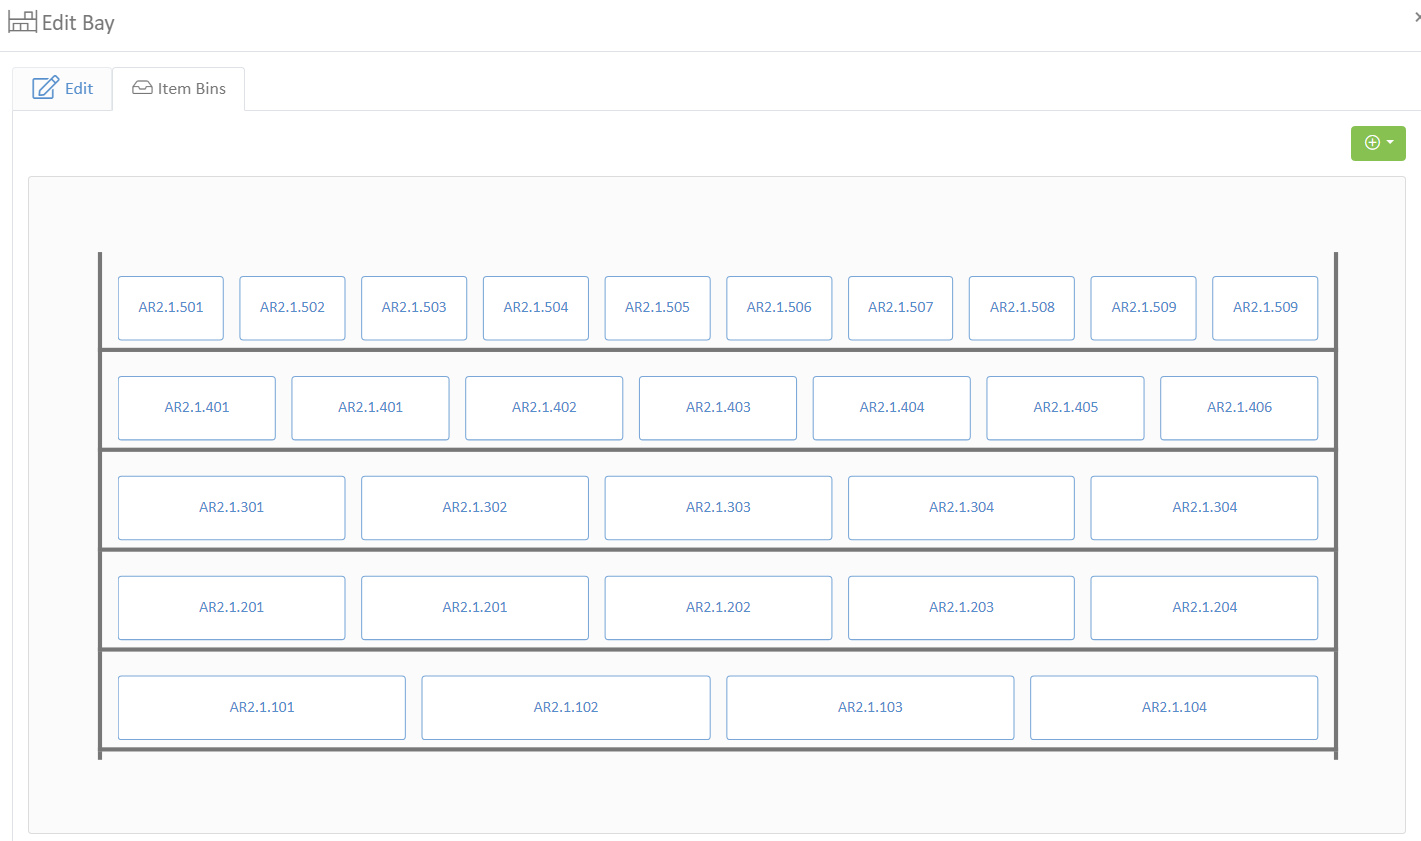
Bay Layout View in Wheelhouse - Bin Location Grid
Warehouse Bay AR2 - Shelf and Position Mapping
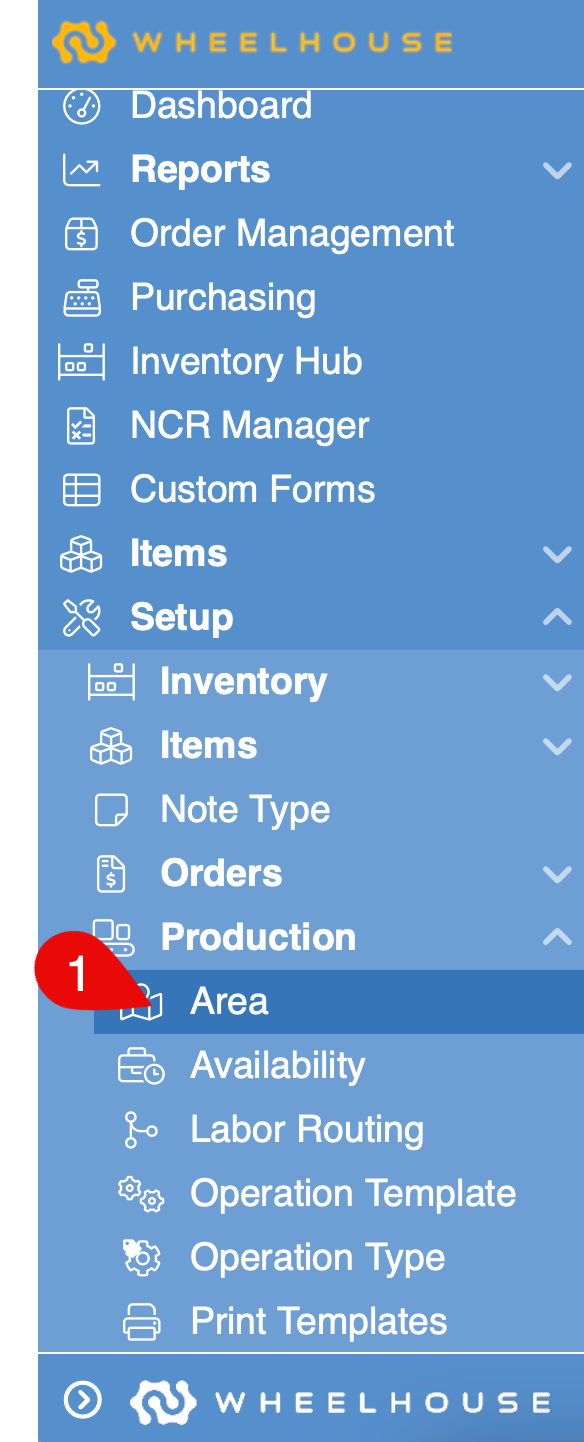
Setting Up Bin Locations
- Open Setup > Production > Area ( or Setup > Inventory > Area )
- Open an Area
- Select the Bays tab
- Click (+) to add a Bay.
- Name the Bay. We suggest using numbers 10, 20, 30, etc, since the Bay Number will be part of the Bin Location. For example, AREA.10.201. Also, skipping from 10 to 20 allows for the insertion of a new bay without re-numbering, for example, adding AREA.15.
- Save the Area
- Open the Bay to edit
- Select the Item Bins tab
- Add the highest bin location to get a visual of your bay quickly. This is the top right shelf since shelves are numbered from bottom to top, left to right.
For example: if I have 8 locations on the top shelf, add bin location 508.
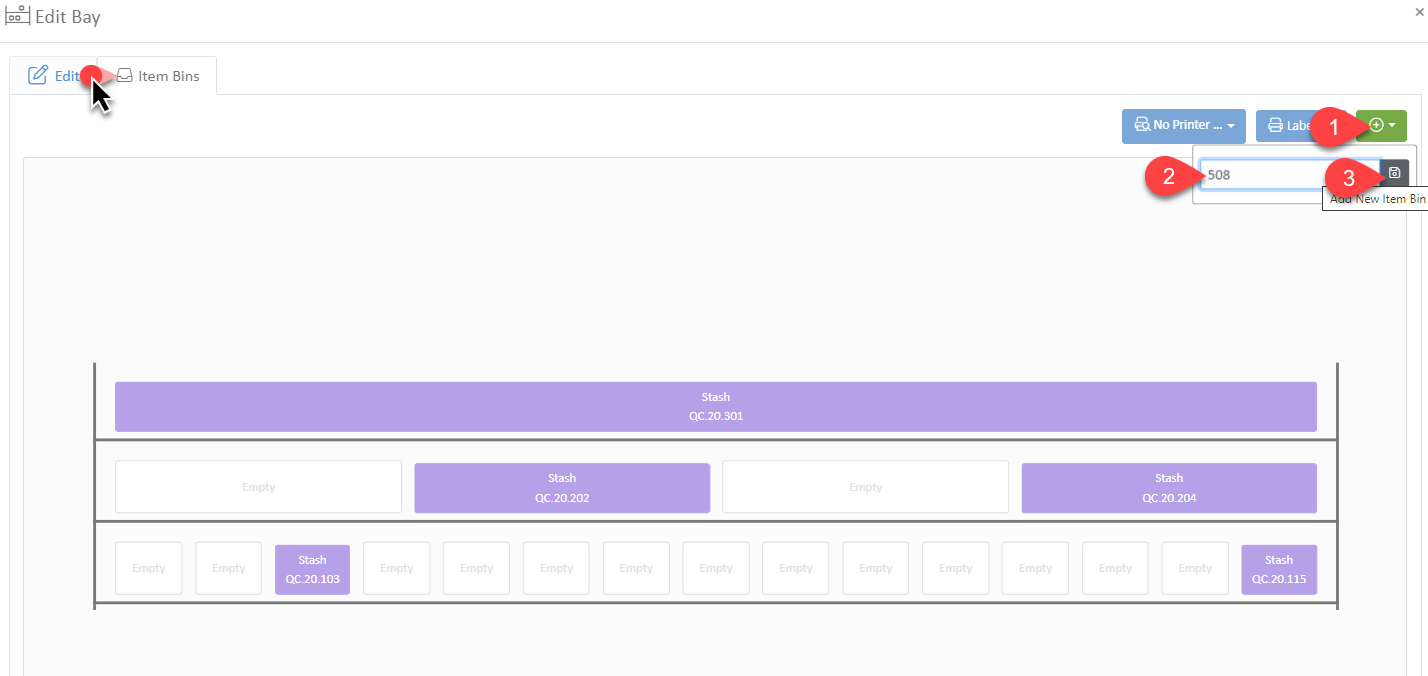
- Select the item to put in that location and click the link button.

- Click on empty locations to add additional items. Click on existing bin locations to remove or edit them.
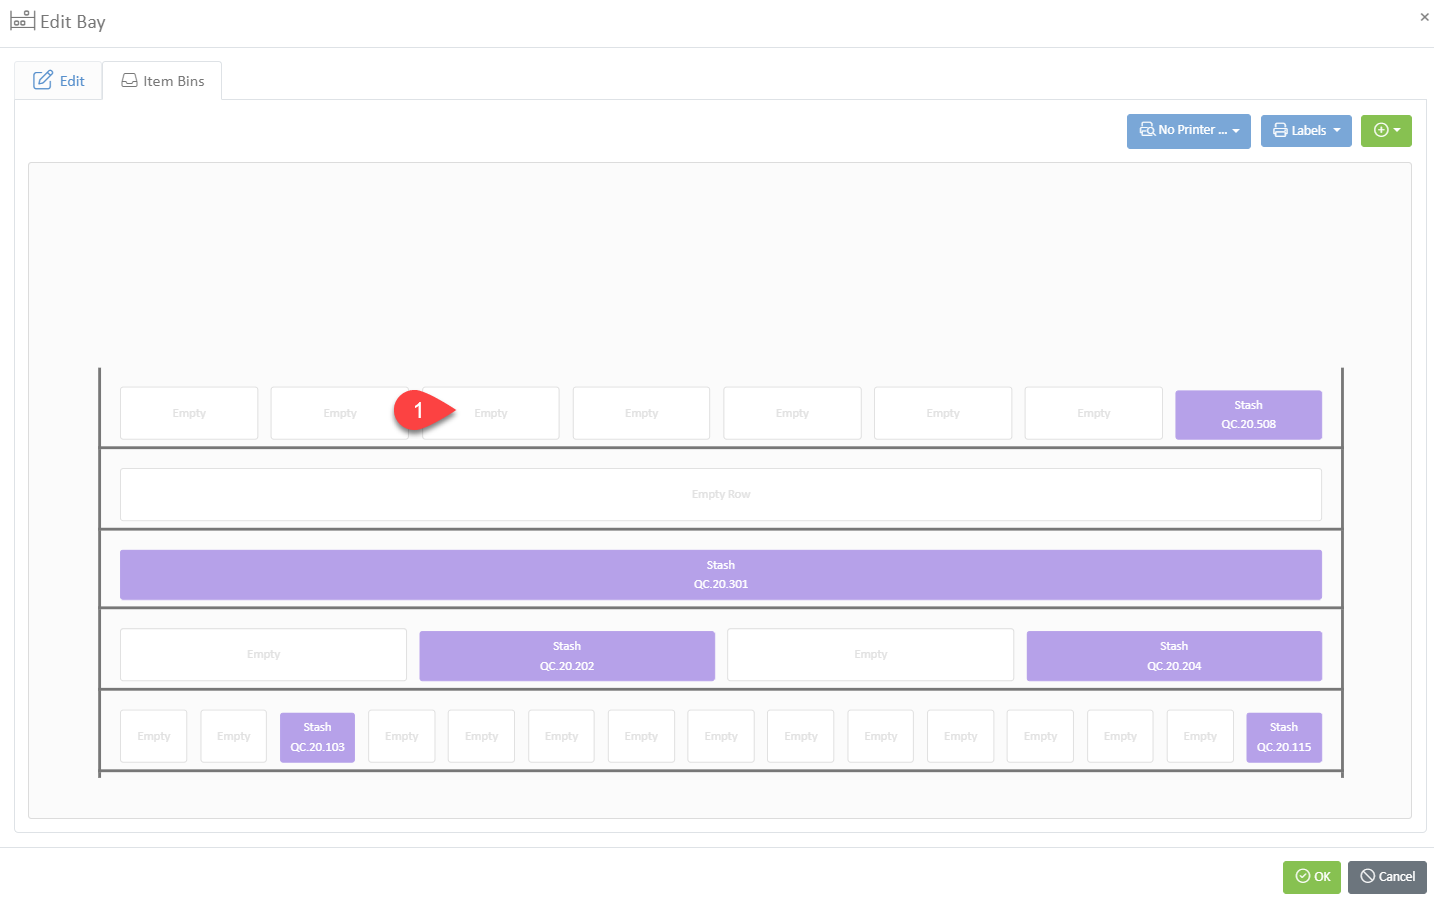
To quickly add positions for all locations on a shelf, add a bin location for the rightmost (highest) position on that shelf.
Connecting Bays to a Work Center
Associating a bay with a Work Center tells Wheelhouse that the bay is in close proximity to the Work Center. This is helpful for inventory picking and Work Order Stash locations.
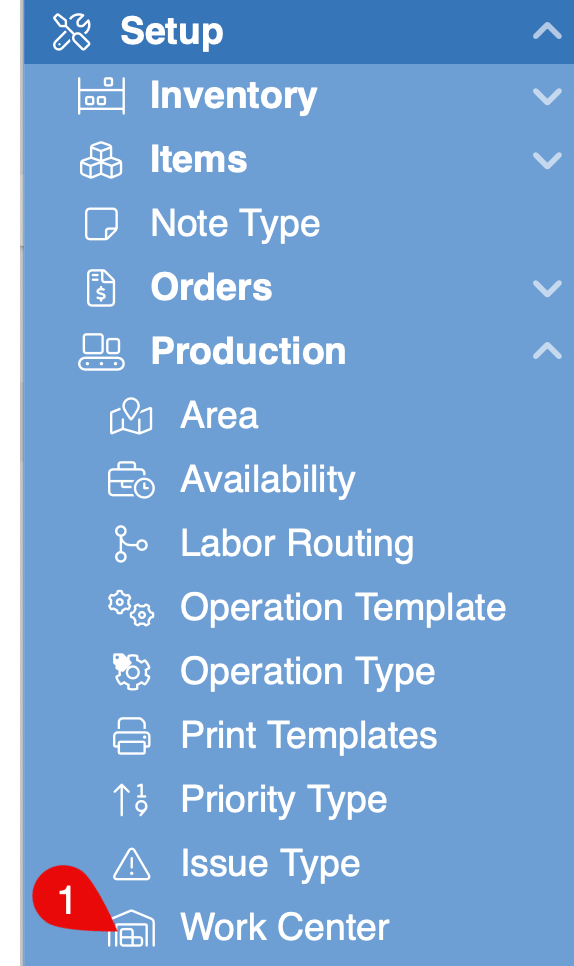
- Open Setup > Production > Work Center
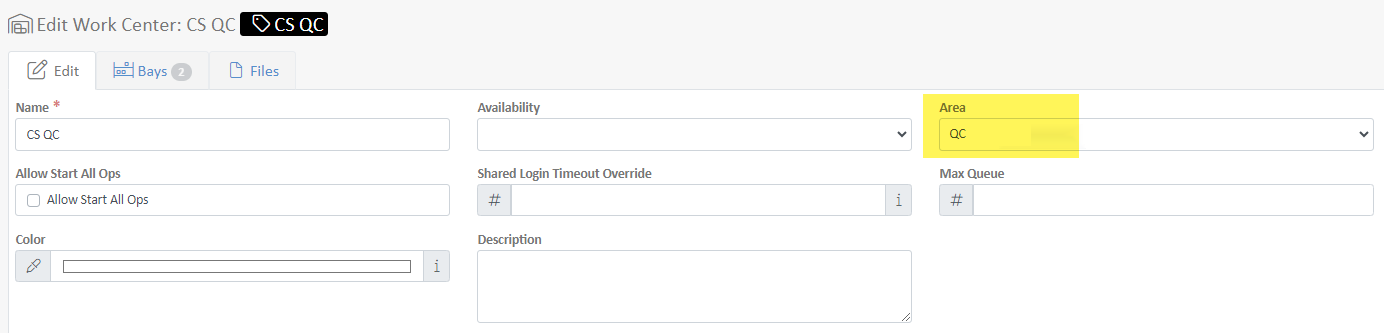
- Select a Work Center to edit
- Verify that the Work Center is in the same Area as the Bay(s) you're connecting.
- Select the Bays tab and use the (+) button to find and add the associated Bays.
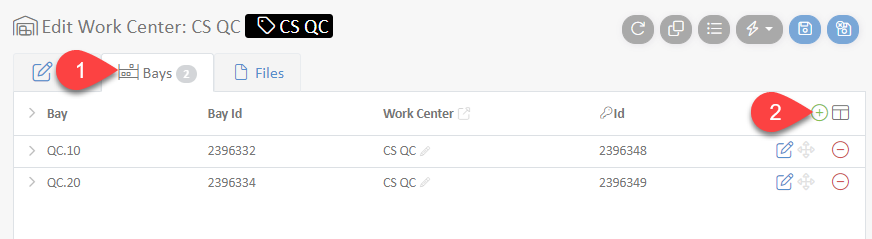
- Save and Exit
Need help? Reach out to support@wheelhousemfg.com.
How did we do?
Merge Line Items at a Certain Step (Stash & Merge Functionality)
Shop Work: Priority Flags and Fixed Position