Adding Dealer and Outside Rep Logins
This article explains how to add logins that allow a dealer agent access to a certain dealer account. Prerequisites. To add logins to contacts, you must be logged into a system that has Dealer Access…
This article explains how to add logins that allow a dealer agent access to a certain dealer account.
Prerequisites
To add logins to contacts, you must be logged into a system that has Dealer Access enabled and an account with the necessary permissions:
- If you are an external user, not on the manufacturer's staff, you must be a Dealer Contact with an Access Level of Admin
- If you are part of the manufacturer's staff, your profile must include the Dealer Access Administrator Role
Adding a Contact and Contact Login
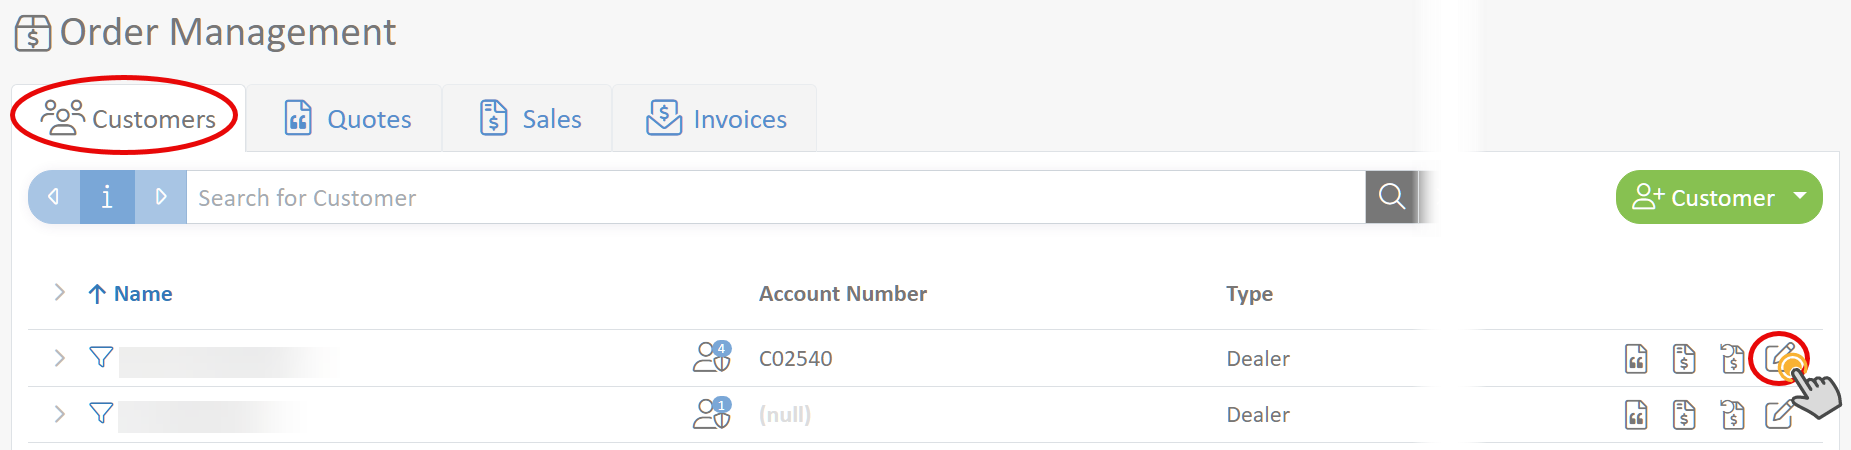
- In the left menu, navigate to Order Management and edit a customer under the Customers tab.
If you don't see a Customers tab, ask your administrator to review your permissions.
- Select the Contacts tab, enter the email address of the contact, and click the Add User icon.
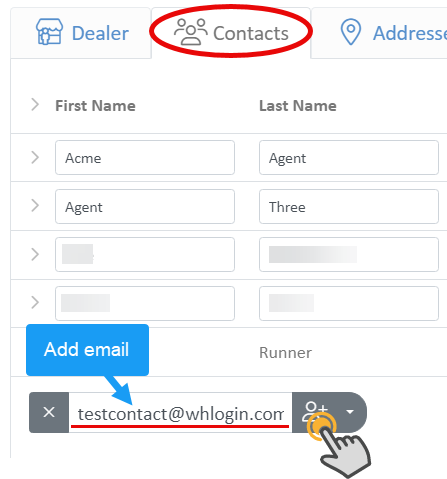
If the email you entered connects to an existing contact, skip step 3.
- Enter the contact's First and Last name.
- Select the Access Level from the dropdown
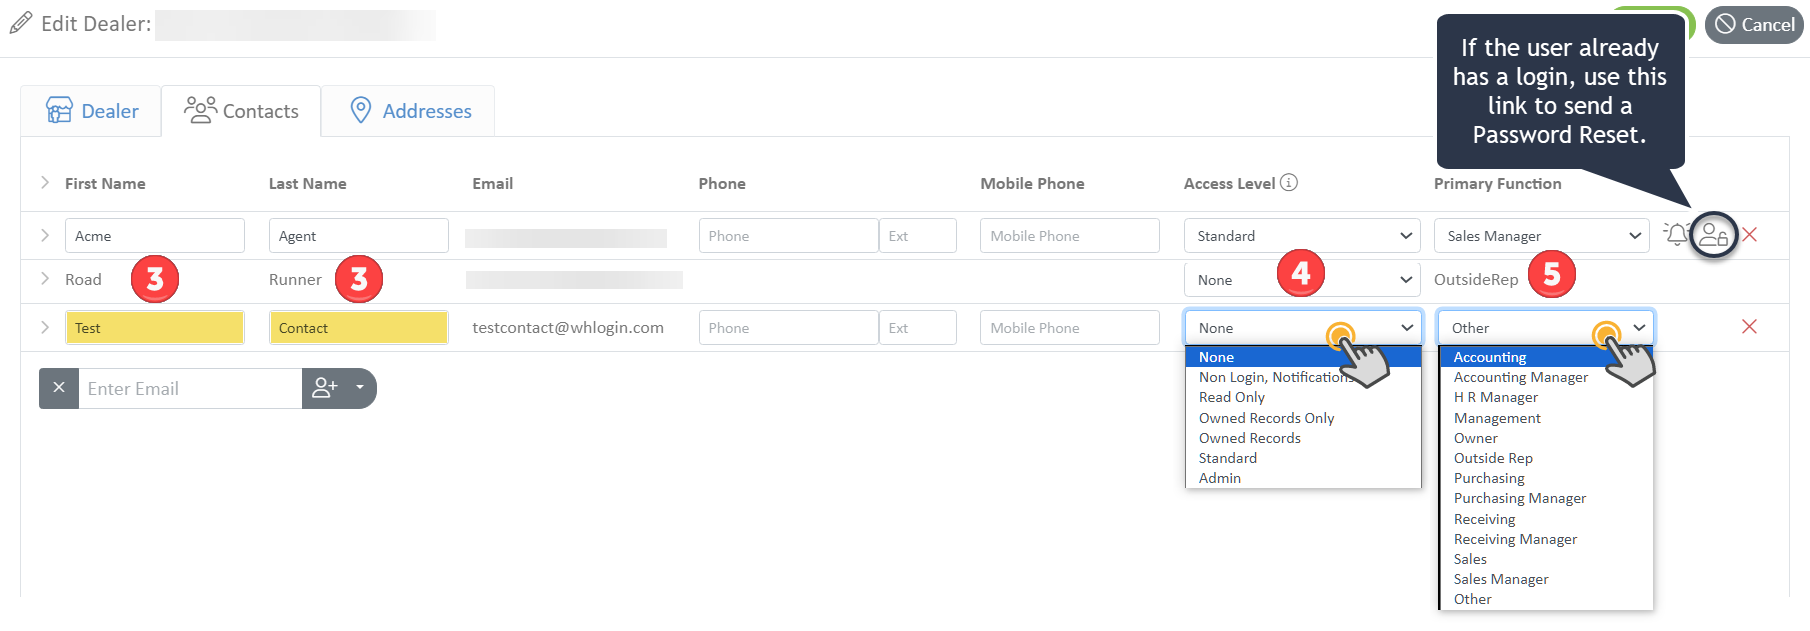
Clicking on the person-lock icon will trigger a dialog asking if you want to send a password reset email to the contact.
- Select the contact's access level. The access level determines how much the new contact can do. The permissions provided for each access level are:
- None: Block the contact's access to the location
- Non Login, Notifications: Blocked access but can receive notifications.
- ReadOnly: View all quotes & sales for the location
- OwnedRecordsOnly: View and Edit Owned quotes & sales for the location
- OwnedRecords: View and Edit Owned quotes & sales they created for the location PLUS View all quotes & sales for the location
- Standard: View and Edit all quotes and sales for the location
- Admin: View and Edit all quotes and sales for the location PLUS Add contacts for the location
- Select the person-shield icon to create a login for the user. Existing users will logins will have a person-lock icon.
How did we do?
Order Management Guide
External Agent Access Levels